Unity Glitch Shader Progress
One of the main aspects of our game is that the player is trapped in this world that is essentially “glitching out.” Because our theme revolves around the theme of the game breaking, we naturally need a good glitch shader which can be applied to a multitude of objects in game.
To make this shader, I started following a tutorial by Gaëtan Fillardet on Youtube named “How to do Glitch Shader Effect on Unity HDRP.” This particular tutorial uses the Amplify shader editor, so I am translating all of the nodes to a regular HDRP shader in Unity.
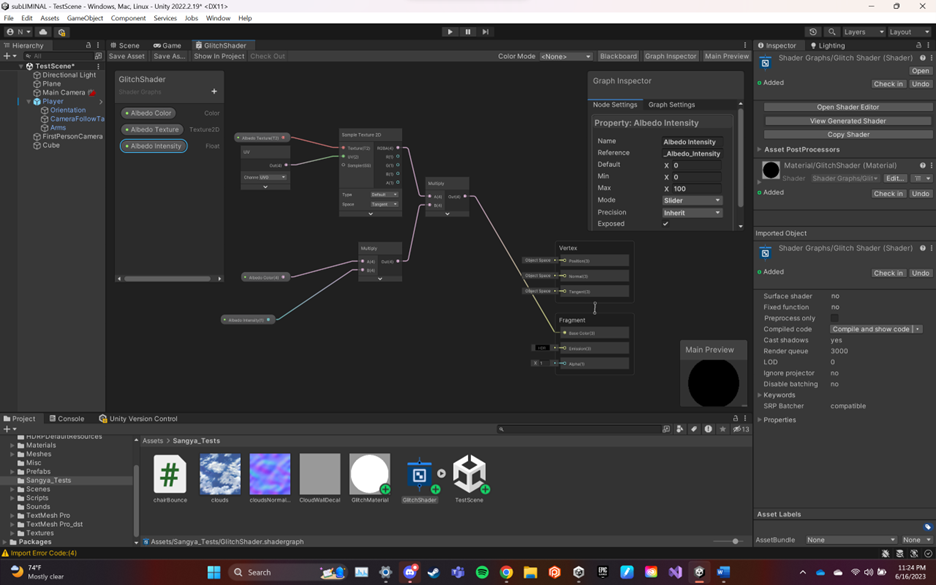
To start out, we need to create some basic things. First, we need a new HDRP Unlit Shader Graph, I named mine “GlitchShader.” We also need to create a Material with a corresponding name. In the inspector, assign the new shader as the source shader. Set this material to transparent as well.
In the shader graph, I started out with a basic albedo color, texture, and intensity to test out my material.
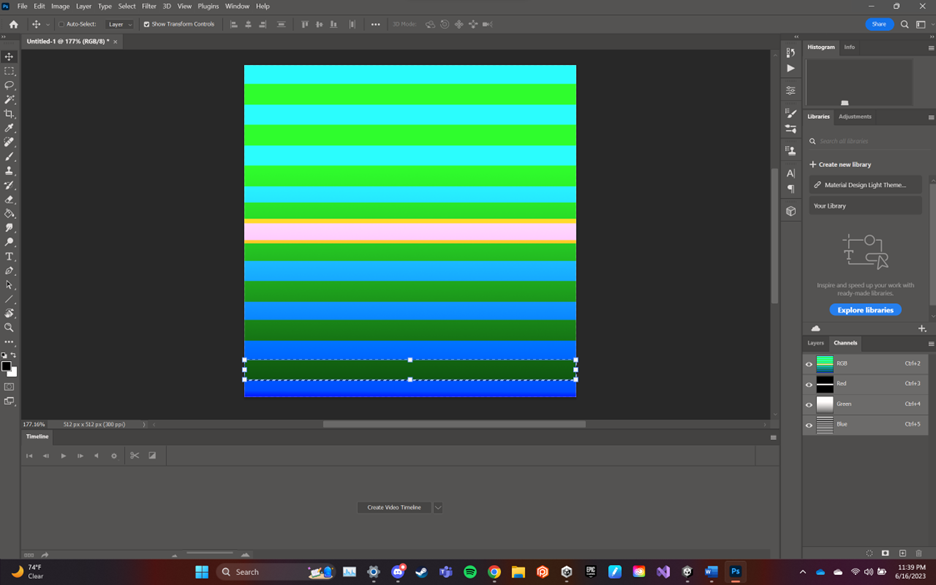
Next, create a base color using the alpha channels – this will create the glitch bars
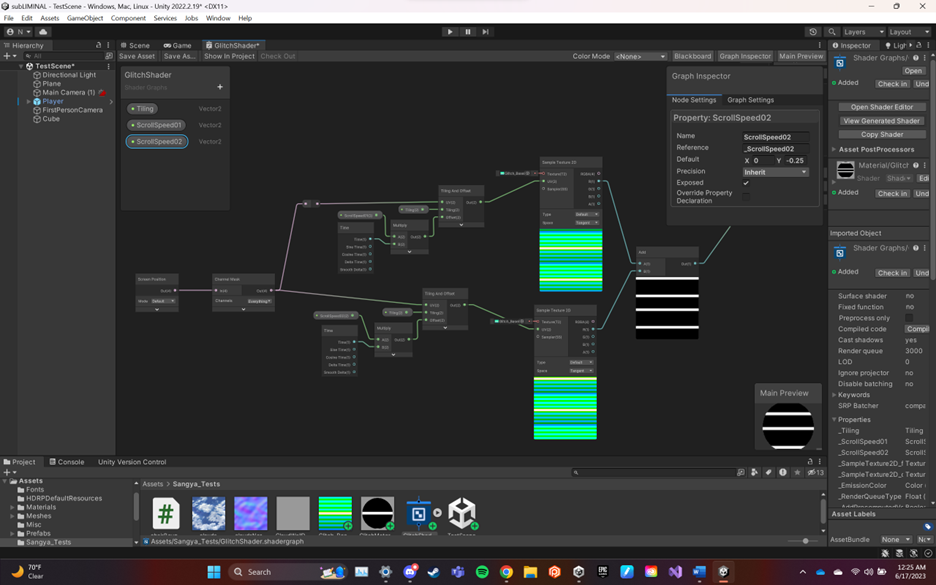
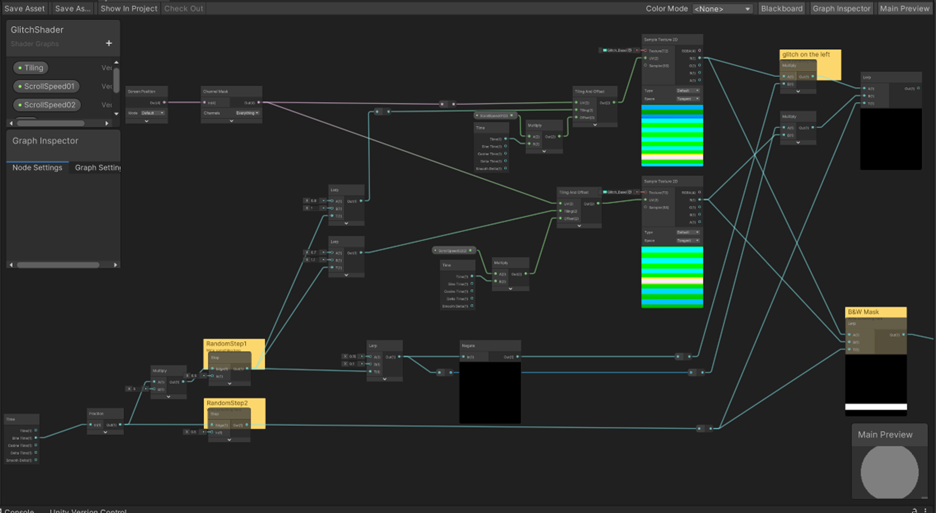
Now add this texture to the shader graph (turn off sRGB in inspector – this is a mask). We now need this texture to pan, but we do not have a panner node. I created one using tile and offset, time, position and multiply nodes.
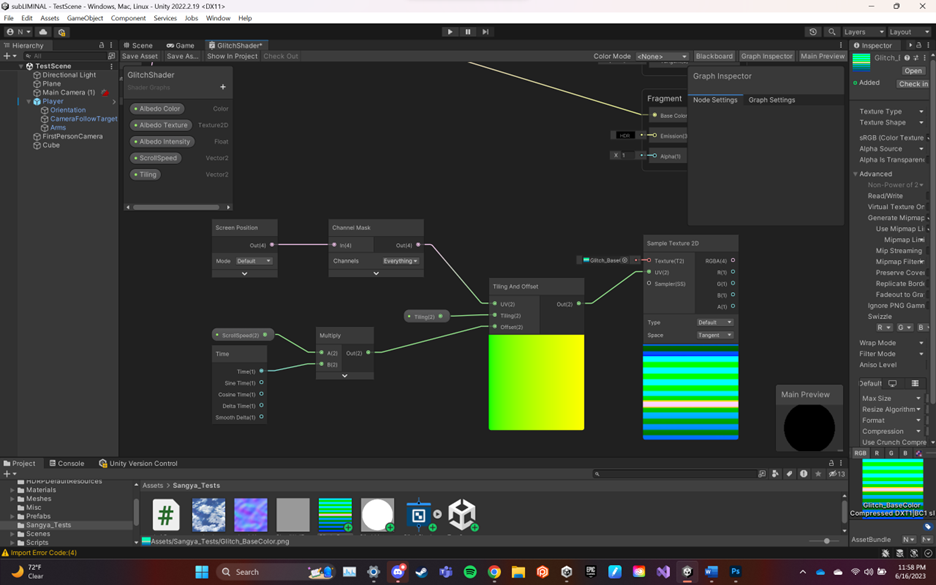
Steps:
- Add a tiling and offset node
- Create screen position node, attach to channel mask node
- Attach this node to UV in tiling and offset node
- Vector2 – scroll speed
- Vector2 – tiling
- Multiply scroll-speed by a time node and connect to offset in tiling and offset node
- Attach tiling node to tiling in tiling and offset node
- Attach the r channel to base color
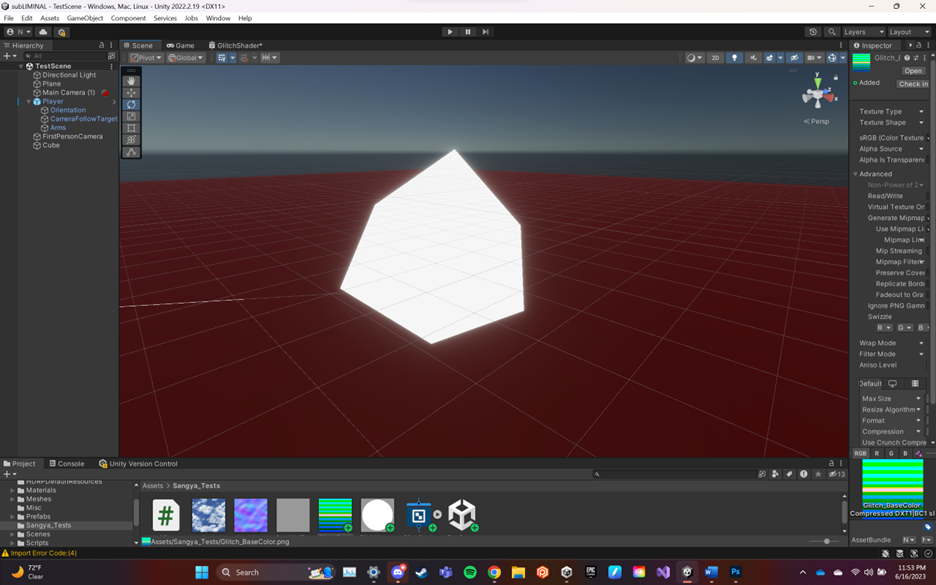
You can now see the bar from the red channel scrolling on the object.
Now duplicate the “panner” nodes and change the speed – add the two panners together and assign to base color – this creates variation
Now, I used a sine wave to create steps which will get fed through a lerp value and create offset steps in the texture when attached to the tiling of the ‘tiling and offset’ nodes – these are random steps 1 and 2. The tutorial uses a sine time node, but I made do with the sine option within the regular time node and it worked just the same.
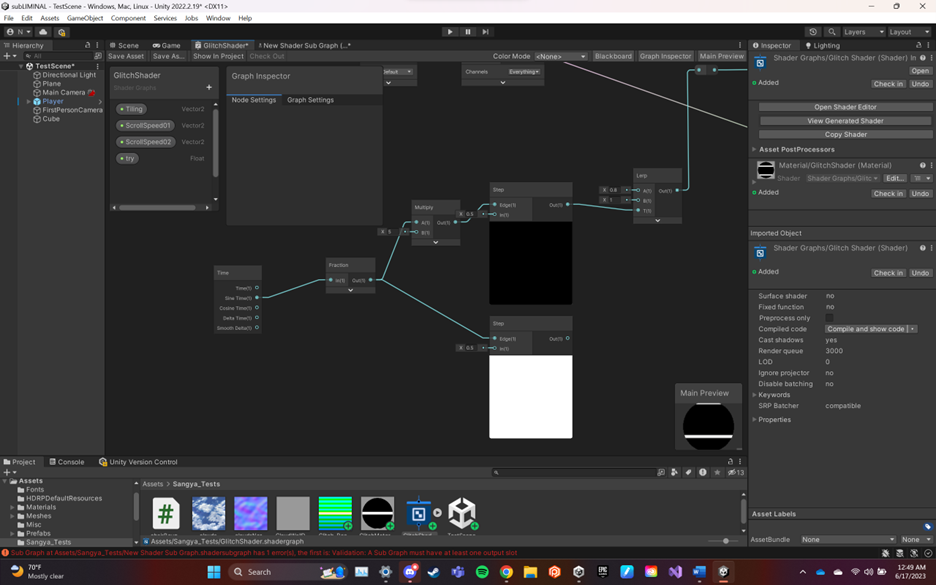
From here, I am creating the base spawn logic for the small glitches. The final glitch system will use a combination of large and small glitches. Here, the tutorial specifies to change the internal scale of the time nodes, which the basic nodes do not have. I instead multiplied the time by the scale and achieved the same result. I multiplied these varied scaled times together and then stepped through them - this creates a basic small glitch spawn.
Here it is working:

Now we move on to the large glitches:
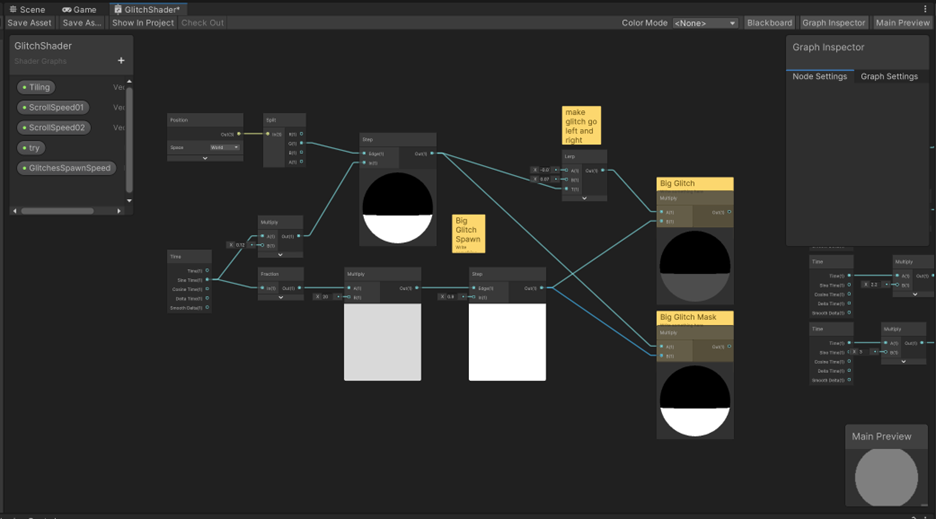
I split the position of the screen and used the green channel and a sine time to create a half-split glitch. I used this to create both the overarching large glitch and its mask.
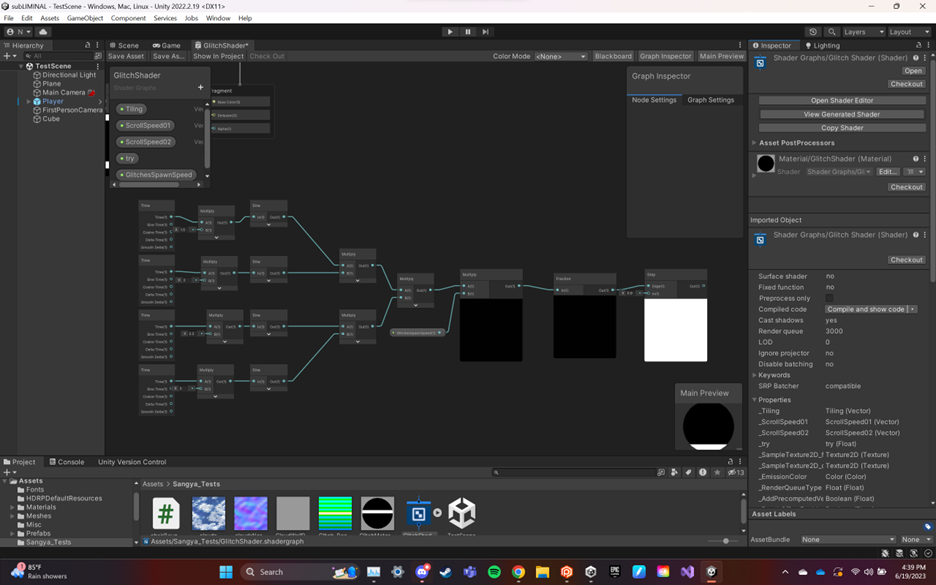
No that I have have all these pieces, I need to start putting them together:
I fed the random steps 1 and created earlier into a lerp, then a negate node, which went into a multiply node to create the right half of the glitches. I fed this directly into the ultiply for the left half of the glitches. This created the base glitch system.
I then took 'random step 2 ' and the red channels from both of the textures from earlier to create a black and white mask for our entire glitch system.
We are getting a bit more complicated.
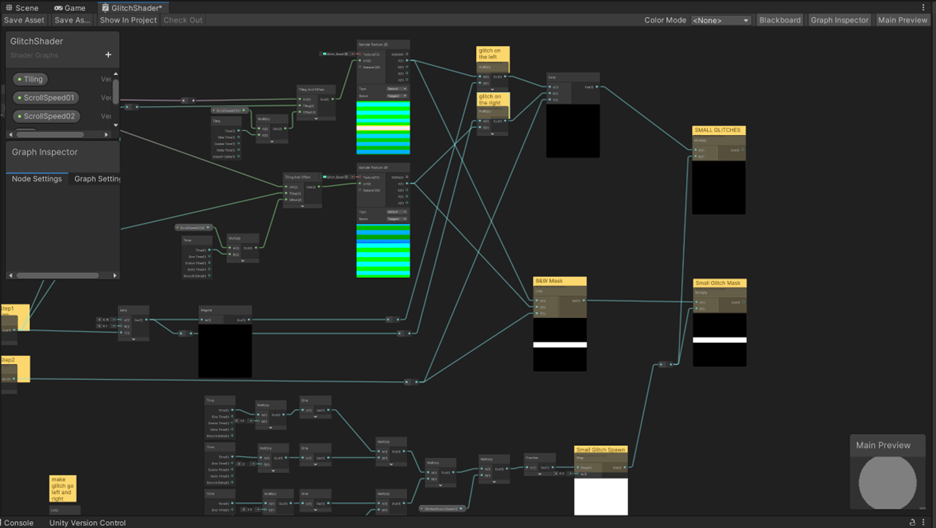
We will use the new mask and system and multiply each by the glitch spawn system respectively. This gives us both a mask and the final small glitch system.
All that is left is to combine the two together!
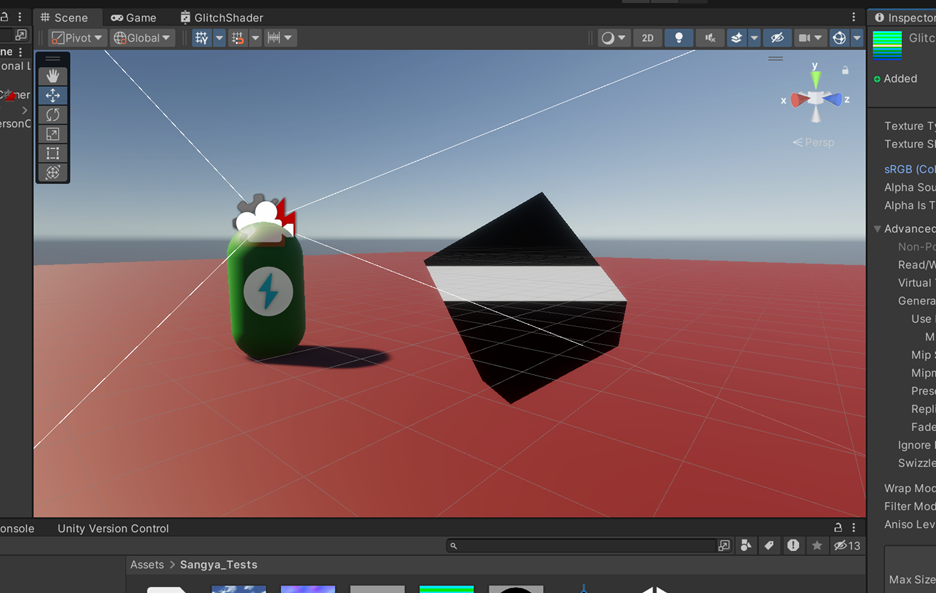
And this is how it looks so far:
Next up, I will be working on adding more variation, color, and transparency to this shader. I cannot wait to see what I end up with!
Leave a comment
Log in with itch.io to leave a comment.